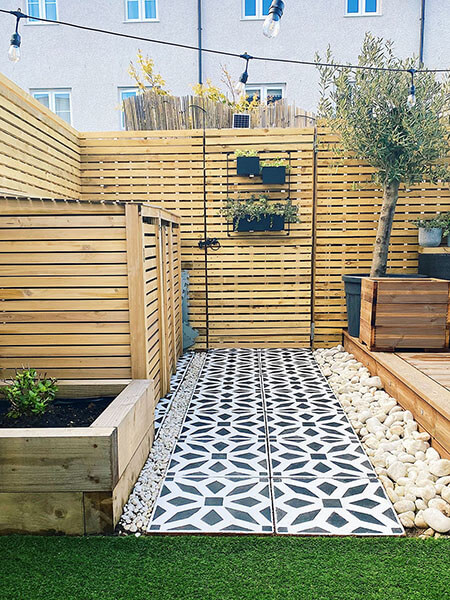
How to give your garden patio a mega makeover for less than £80
Transforming your garden can be pricey, but fear not, Alex Lawson from Casa Lawson shares exactly how you can give your garden an incredible makeover on a budget.
Published: June 2023


Things you will need:
- Paint roller
- Paint tray
- Mini paint roller
- Masking tape
- Stencil of choice (I used one from DizzyDuck Designs Link opens in a new window)
- Masonry paint - two colours, one for the base and one for the design
- Concrete stabilising agent
- Patio & concrete sealer
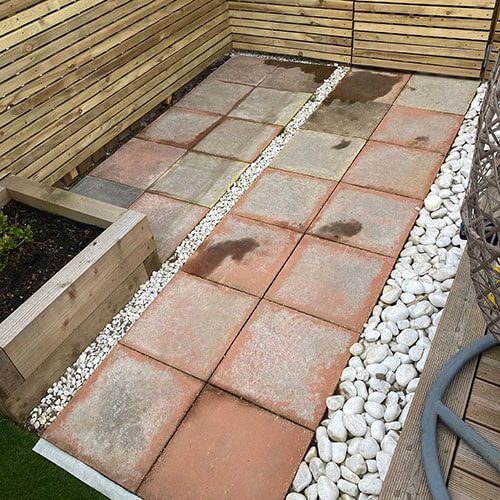
Step 1 – Clean the patio & apply the concrete stabilising agent
Before you start applying any paint to your patio you want to make sure it’s as clean as possible. You can clean the patio either by power washing or by scrubbing with a bristle brush and hot soapy water. Once you have cleaned the patio you want to apply two coats of concrete stabilising agent. I used Dulux stabilising primer but there are lots of brands on the market.
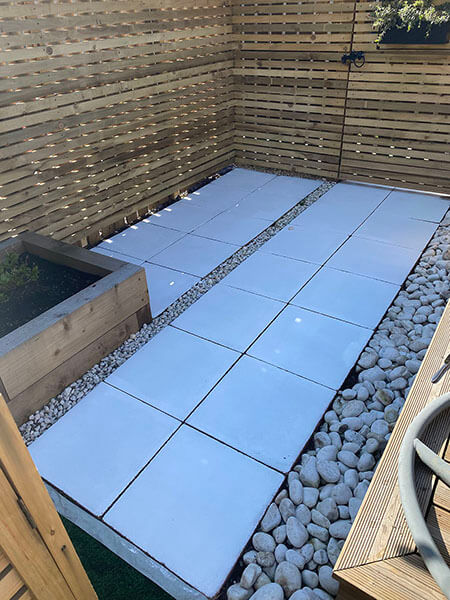
Step 2 – Apply your basecoat paint
Once the stabilising solution has dried it’s time to apply the base colour you want for your patio. I used Sandtex Masonry paint in pure brilliant white. I applied two coats of this, allowing suitable drying time between. It’s really important you check the weather forecast before you start as a lot of Masonry paints recommend not using them in temperatures lower than 12-14°C to allow the paint to cure properly. This is a summer project for sure! I used a paint roller to apply the base and found two coats was suitable for full coverage of the old pink stone colour of my tiles.
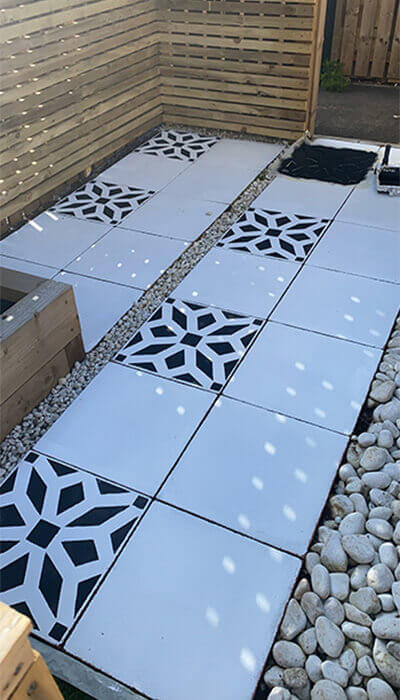
Step 3 – Start Stencilling Your Design
Once the base coat is dry you can start to stencil on your design. I used a stencil made by DizzyDuck Designs. They are able to alter it to be the exact size for your patio tiles. I went for the Midar tile stencil Link opens in a new window but they have so many beautiful options to choose from. The key here is to use thin coats of paint. I used masking tape to secure the stencil so it didn’t move during painting and applied a very thin coat of paint to ensure it didn’t bleed. I did alternating patio slabs each time & wiped the back of the stencil after every 2-3 slabs to prevent paint transfer. Patience is needed for this stage and it might be worth having some knee pads as my knees definitely got sore after doing this for a while!
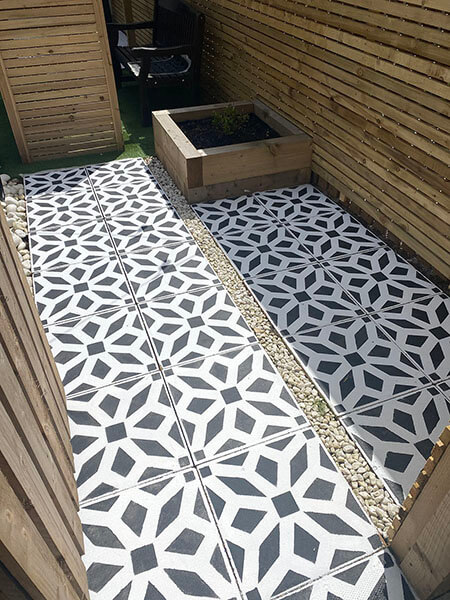
Step 4 – Seal Your Patio
Once your stencilled patio is completely dry, it’s time to seal it with patio sealer. I did three coats for mine. This solution is very watery but it protects it from staining over time.
Step 5 – Enjoy your new outdoor haven
After this you can step back and enjoy your patio makeover all summer long.
The makeover lasted around 18 months before needing touched up. To touch up I power washed & repeated steps 1-4.
Looking to give your garden a makeover on a budget?
Set up a dedicated garden savings pot in your Virgin Money mobile banking app today.