Five under £100 hacks that will make your home look more expensive
Making your room look expensive doesn’t need to break the bank. From bathrooms to kitchens – here’s how you can make your home look luxe for less.
Published: February 2024


The cost-of-living crisis has made most people increasingly conscious about how they spend their money. But just because you’re watching the pennies, doesn’t mean you can’t still create stunning interiors that look more expensive than they really are. Whether it’s adding panelling, being clever with paint, or updating old furniture, there are lots of incredible interiors hacks you can do for less than £100.
Start with your local charity shop, eBay Link opens in a new window or Facebook Marketplace Link opens in a new window, all great places for finding pre-loved furniture, leftover paint, spare wallpaper and fittings at bargain prices. Just be willing to put in some time to searching for the right item and thinking creatively. “You really don’t need a lot of money to bring a big change to a room,” said one of our interior enthusiasts and these simple, statement hacks prove it so, go on, be inspired.
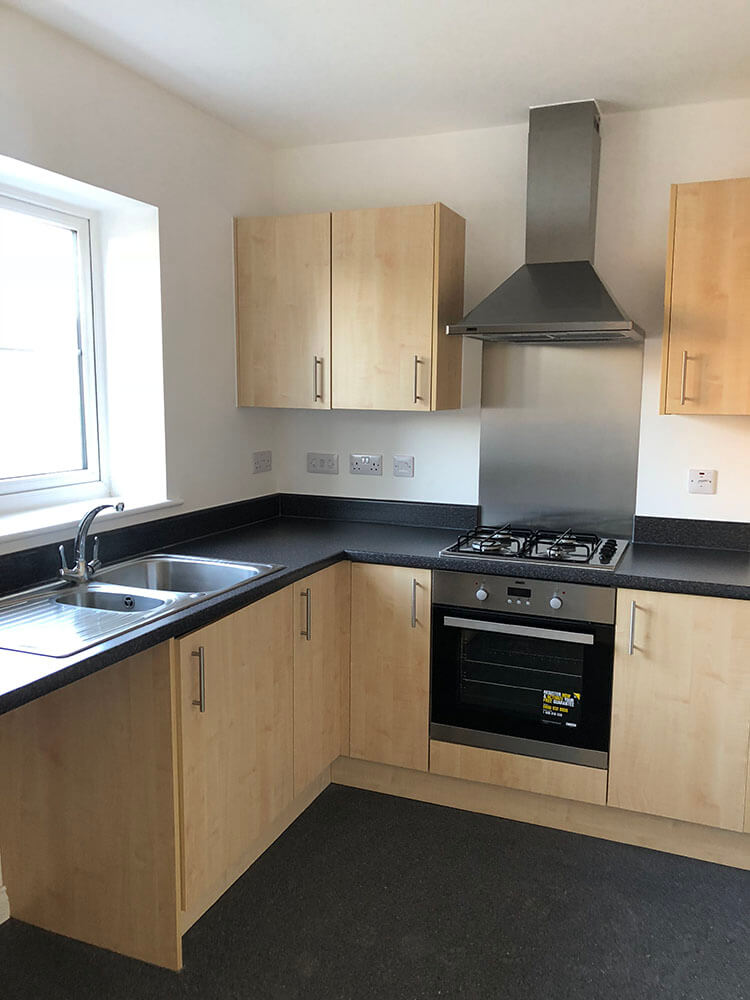
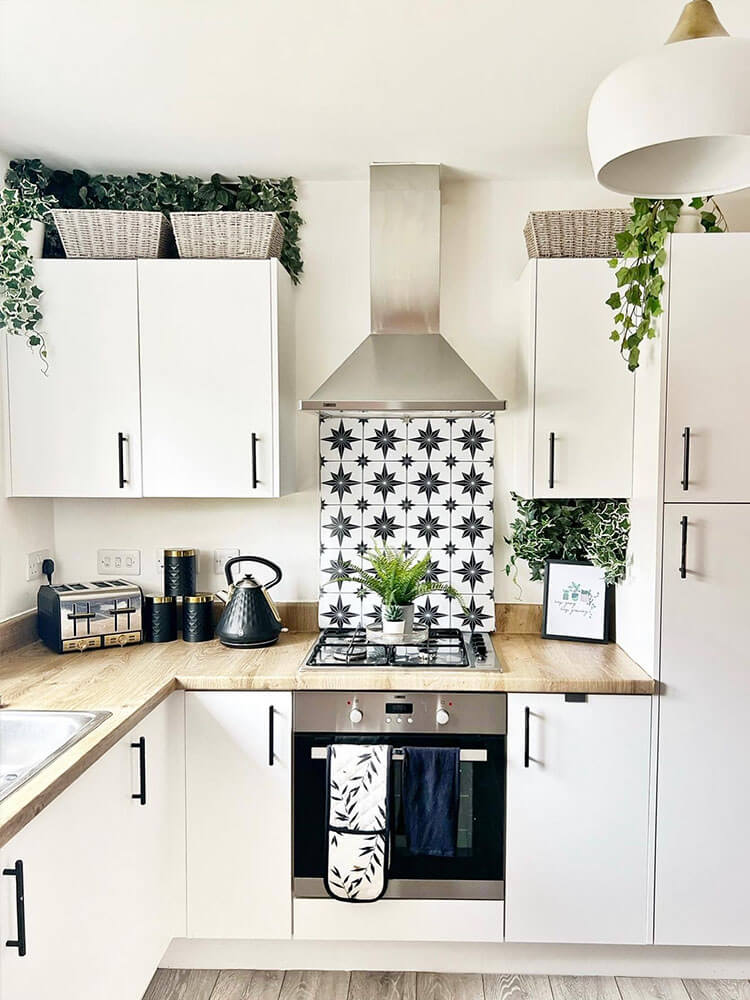
1. Transform an old kitchen with vinyl wrap
Total cost: £96.30
DC Fix Ribbeck Oak Vinyl 6m x 90cm Link opens in a new window, £33, dcWrap
DC Fix Matt White Vinyl 8m x 67.5cm Link opens in a new window, £35, dcWrap
Jes Rose Vinyl Astral Stars 1m x 50cm Link opens in a new window, £23, Jes Rose
Rustoleum Spray Paint Link opens in a new window, £5.30, Sprayster
DIY influencer Jenny Game, of Jen’s Home Journal Link opens in a new window, worked marvels on her dated kitchen with the clever use of vinyl wrap. She used it on the worktops, cupboards, surrounds and splashbacks to change the entire feel of the kitchen, transforming it from drab to fab in less than a week. "The process of applying vinyl itself is actually really easy, the best way to achieve a great finish is to peel the backing away 10cm at a time and smooth out.” The only equipment she needed were a smoother tool and a little craft knife – plus something a little unexpected. “If there’s any creases when laying, simply peel back that section and apply a little heat using a hair dryer to remove - you can also use the hair dryer for the edges to help seal them too as it makes the vinyl more pliable and the backing more sticky.” If you spot any little bubbles when you’ve finished, she suggested smoothing them out by simply popping with a pin and pushing the air out for the final finish. She completed the look by removing the handles and spray-painting them before putting them back on the cupboards. The results were seriously impressive.
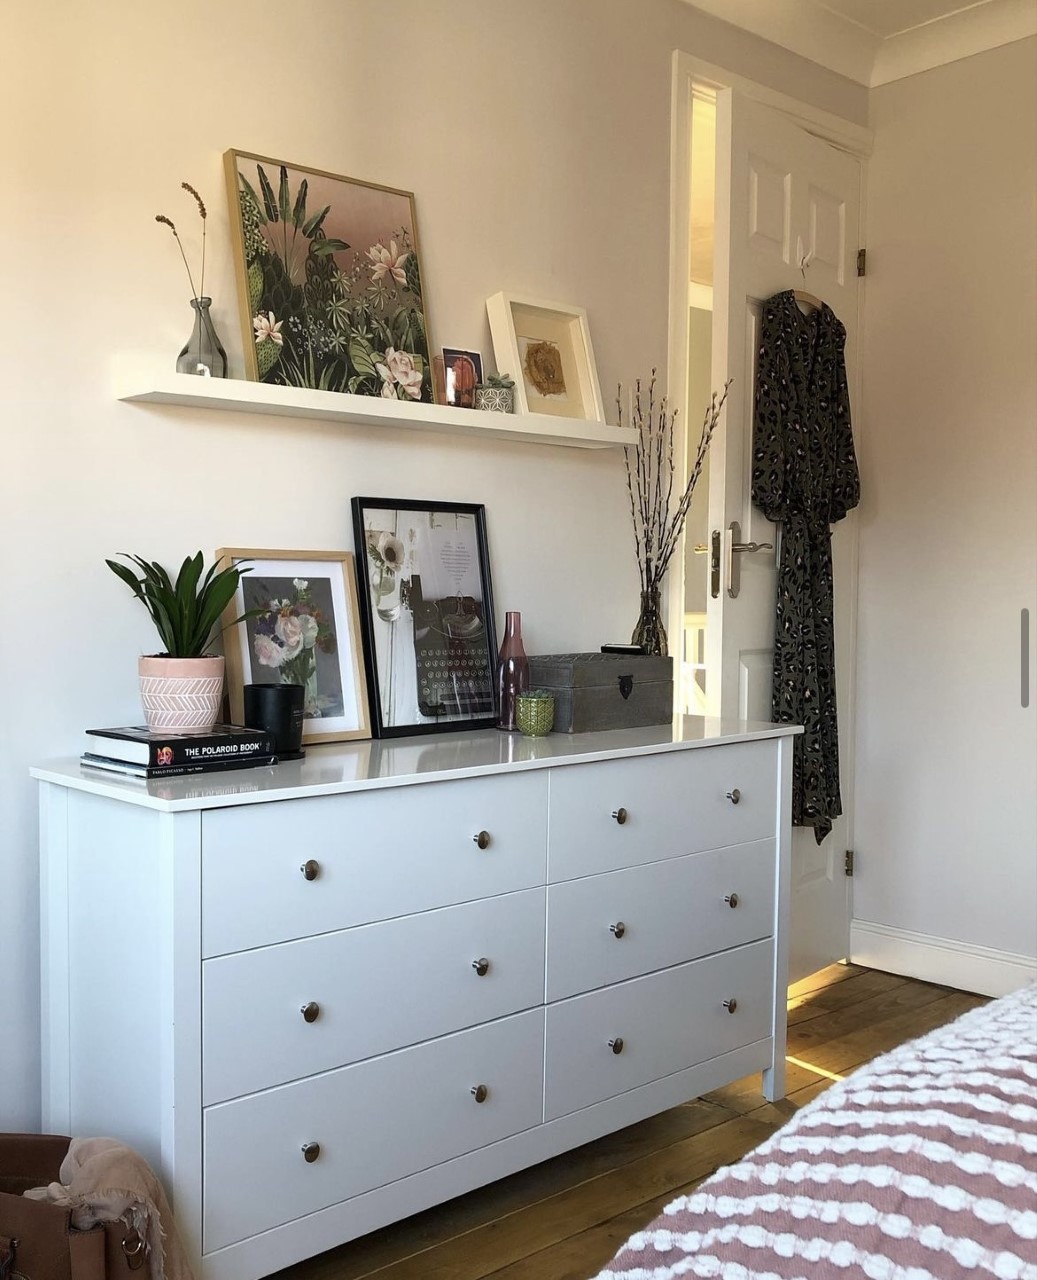
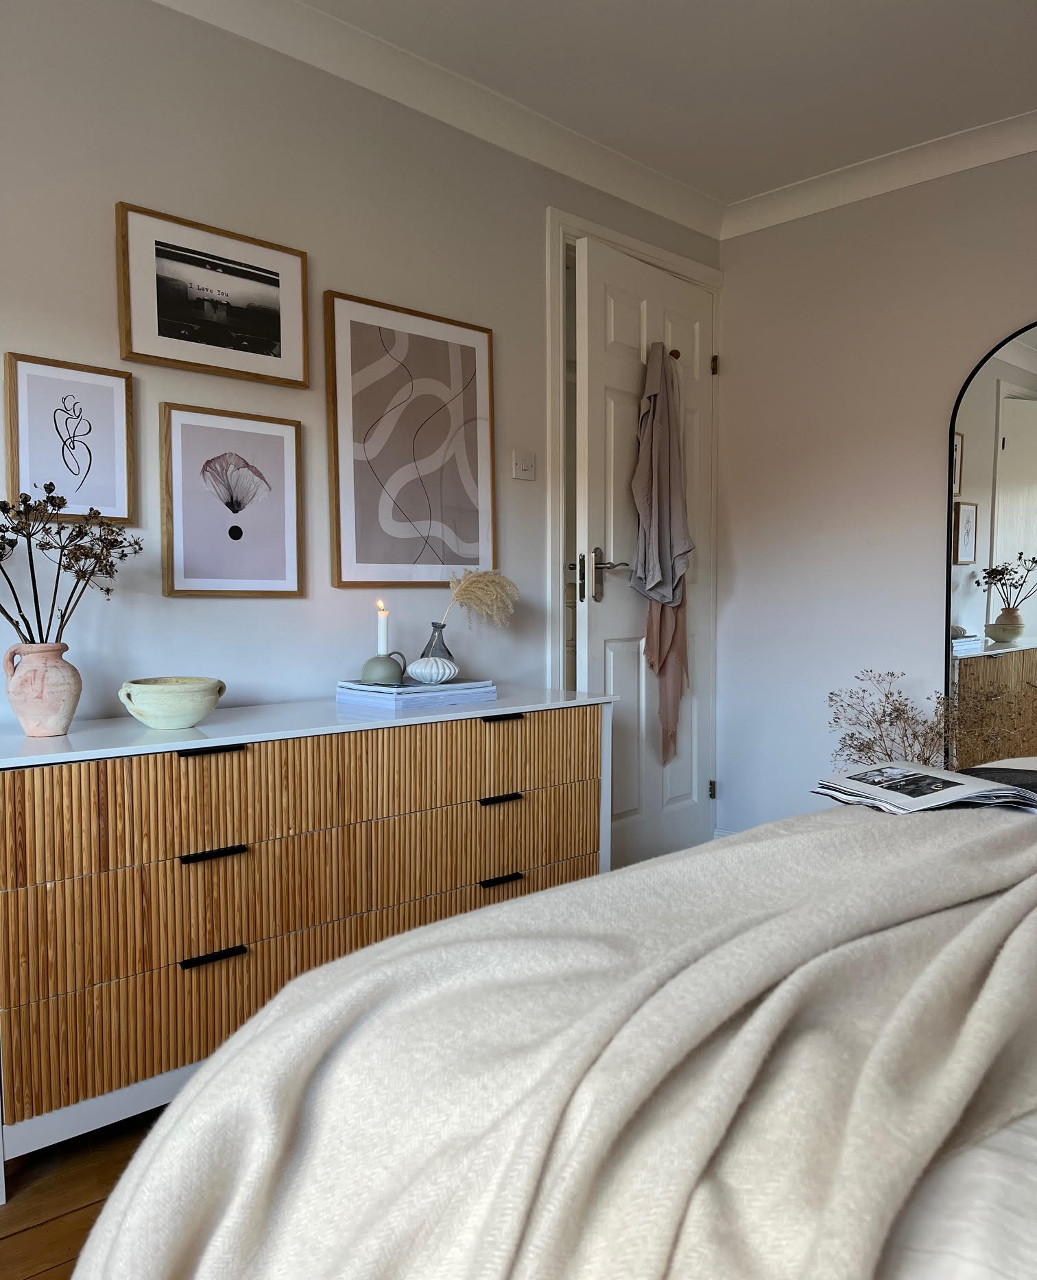
2. Add texture and new handles to old furniture
Total cost: £68.17
Half dowelling pine Link opens in a new window, £50, B&Q
Gorilla Glue Link opens in a new window, £7.98, B&Q
Handles Link opens in a new window, £10.19, Amazon
Home influencer Georgina Raine Link opens in a new window breathed new life into this old chest of drawers with a few simple hacks and a bit of creativity. “I used cheap strips of half dowelling pine Link opens in a new window, which you can pick up from any hardware store, and cut down and glued Link opens in a new window it onto the front of some old drawers to repurpose them.” She used mitre shears to do the cutting and then finished off the look with matt black, over-the-lip handles that she bought off Amazon Link opens in a new window. “It was a quick and easy way to make an old set of drawers look more expensive, as well as on trend with the fluted detailing. This method can be applied to lots of furniture to give it a new lease of life, be more sustainable and, of course, save money. Try different patterns, styles of wood or even paint the wood to add your own personality to any project.”
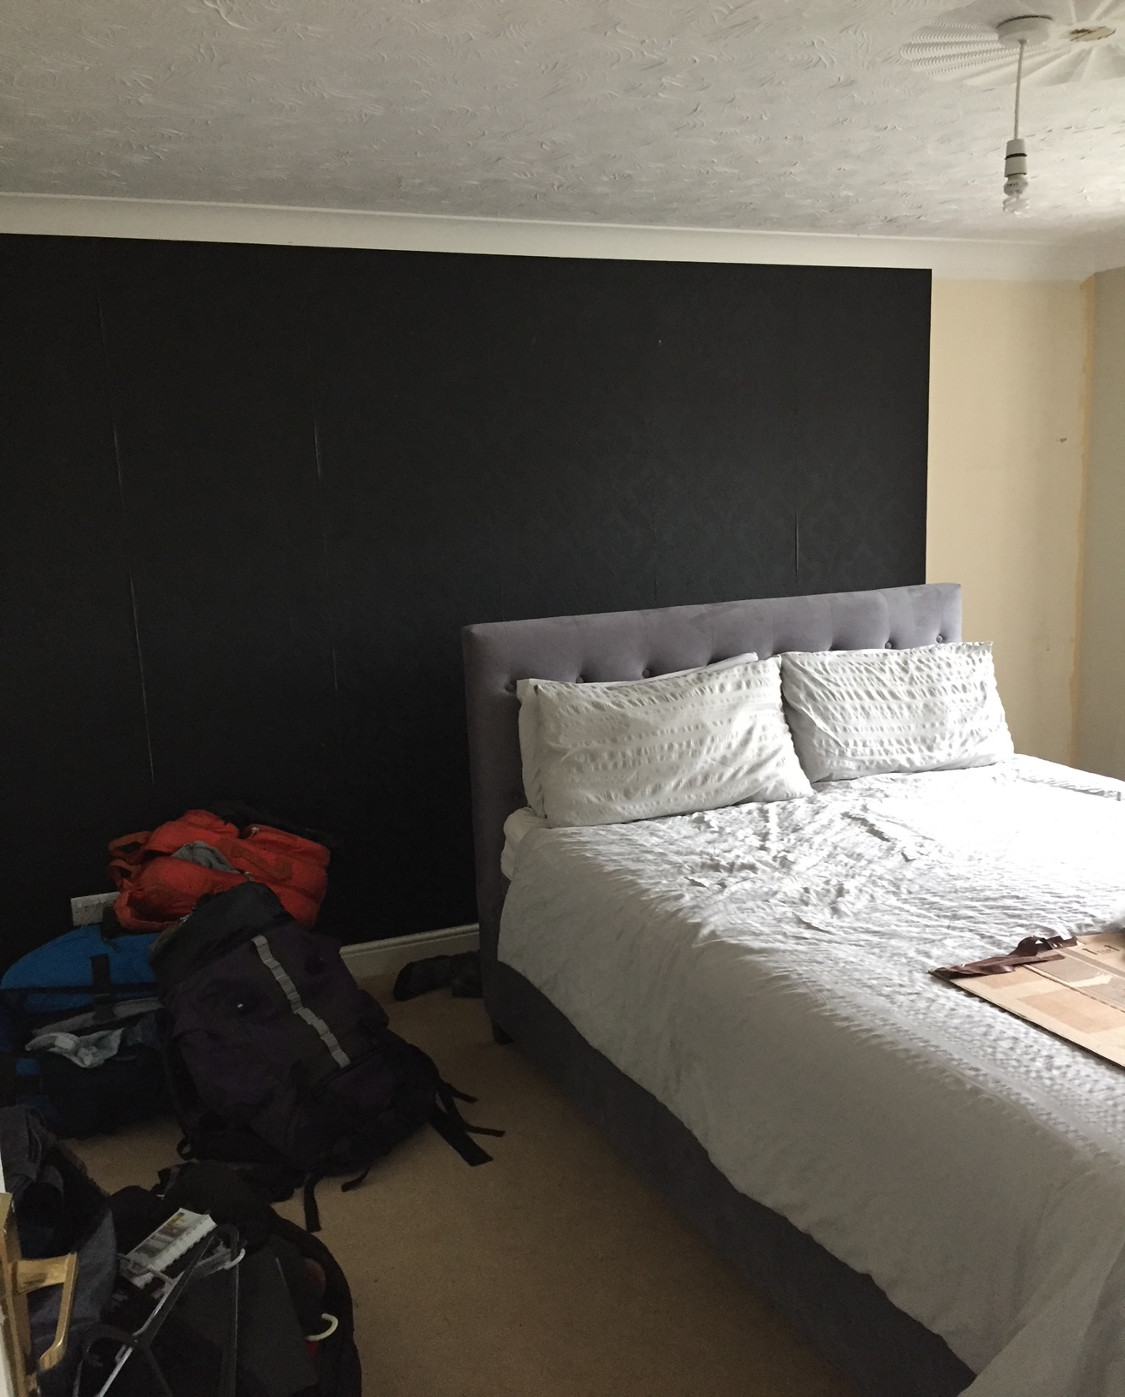
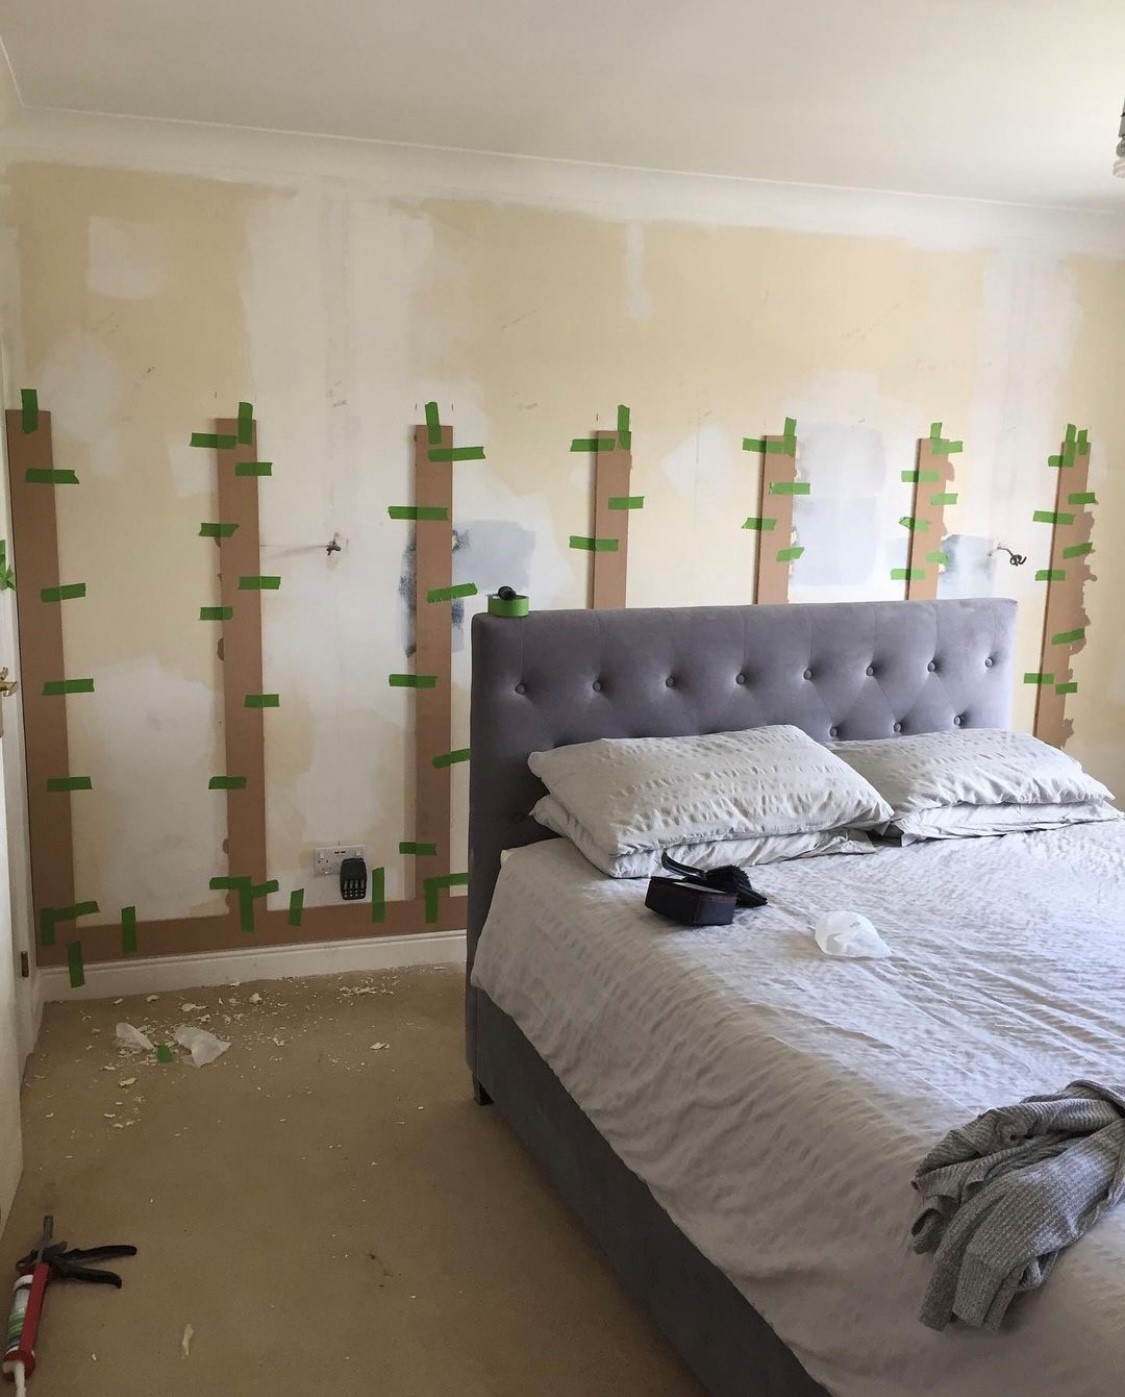
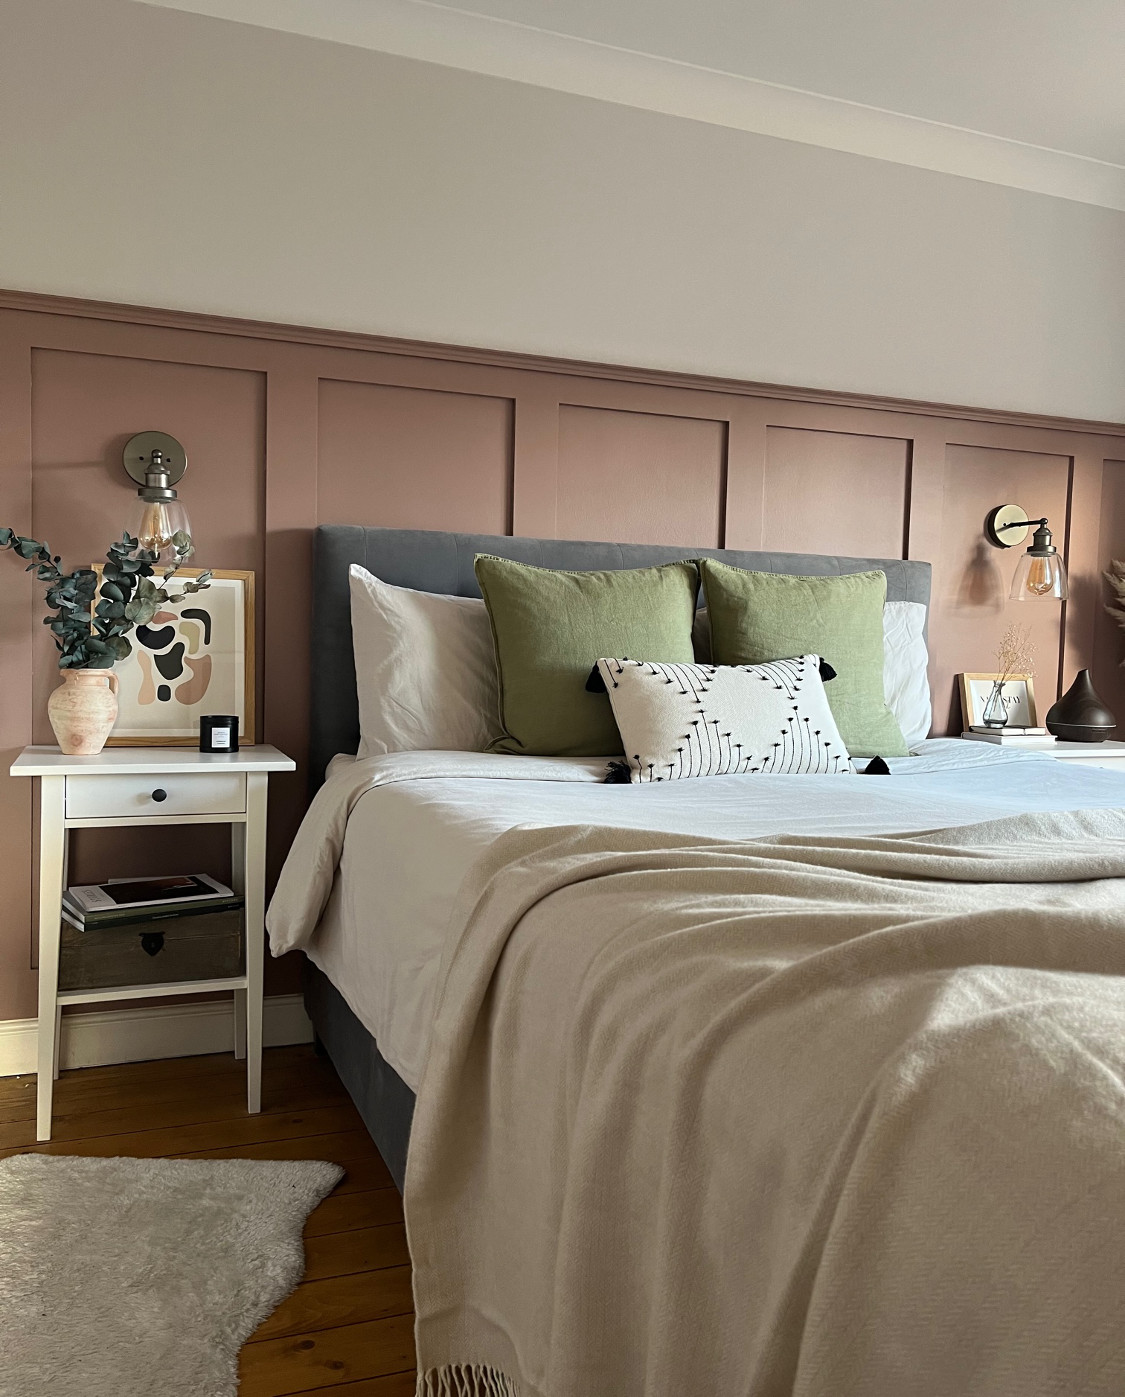
3. Add MDF panelling
Total cost: £70.85
MDF Link opens in a new window, £25, local wood yard but available at B&Q too
Decorative strip Link opens in a new window, £10.40, Wickes
Farrow & Ball paint Link opens in a new window, £32, Homebase
Decorators caulk Link opens in a new window, £1.20, Wickes
Instant Grab Link opens in a new window, £2.25, Wickes
Georgina Link opens in a new window also used MDF panelling Link opens in a new window around her bedroom, instantly giving it a high-end feel. “I sourced the MDF from a local woodyard and had the strips cut to size, saving lots of time and making the installation easier. Many hardware stores like B&Q also offer this cutting service for free.” She then drew out the panelling on the wall to ensure the measurements were correct and used a laser level to check they were straight before applying with Instant Grab Adhesive Link opens in a new window. “You can also use masking tape to map out where the panelling will go, which can be a really good way of visualising the end result before committing. If you have uneven walls, small tack nails are great, just use wood filler and sand over the top.” She then added a decorative strip Link opens in a new window on top and for a nice, smooth edge. Georgina used decorators caulk Link opens in a new window and then primed and painted the wood. “Our property is a newer build, lacking in character, so panelling is a quick, simple and cheap way to add depth to any space. Using it on a feature wall in a bedroom, and placing the bed in front, really focusses a room.”
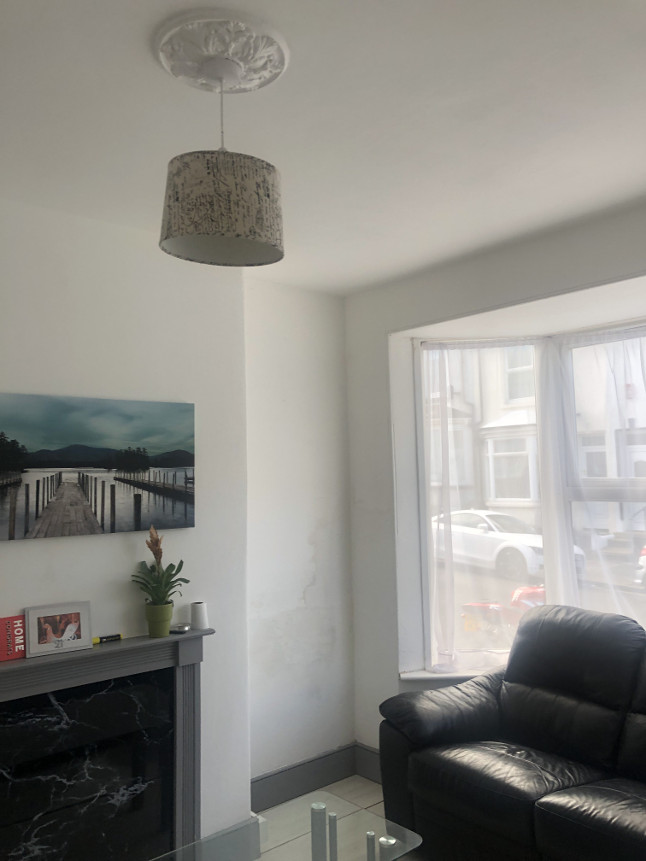
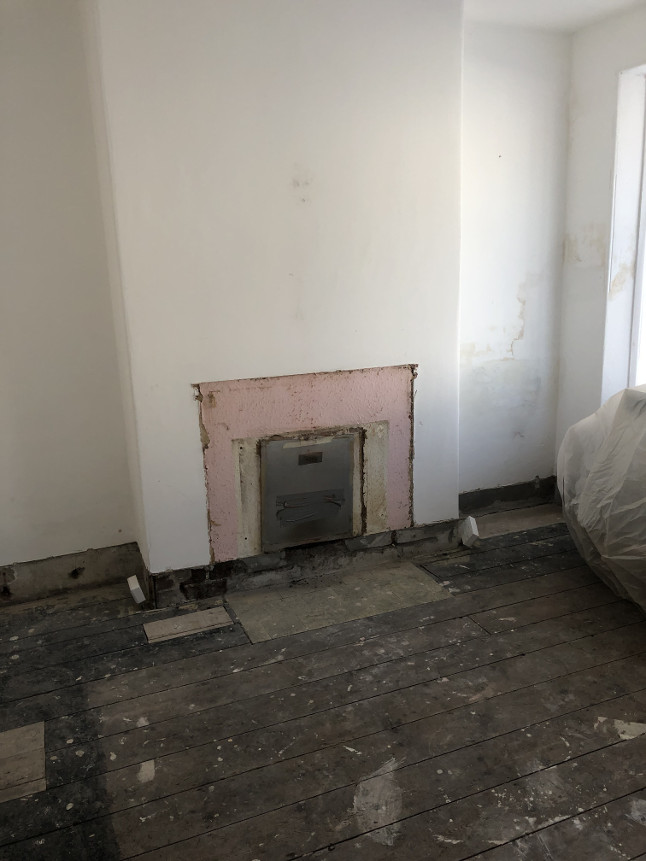
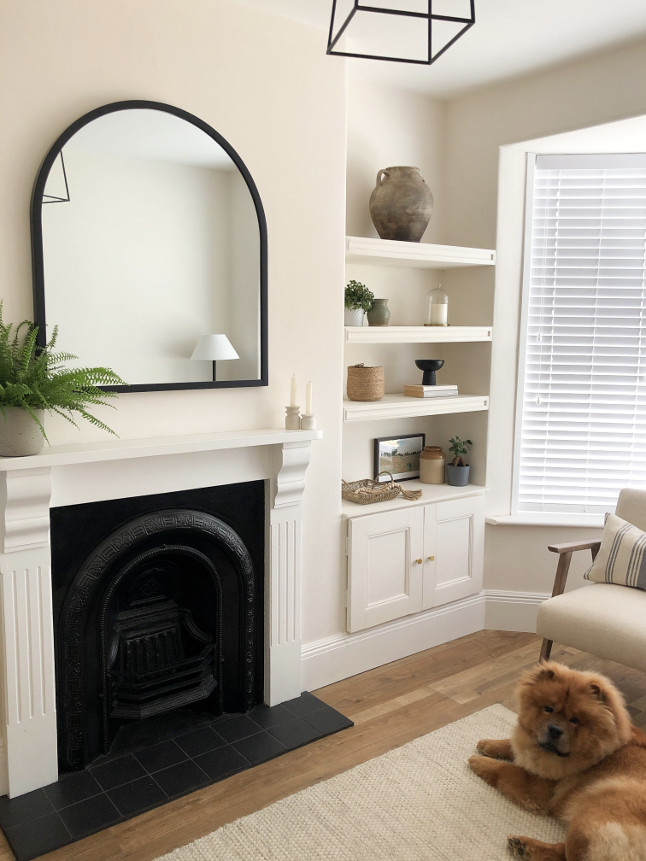
4. Add an antique fireplace and freshen up the walls
Total cost: £93.10
Facebook Marketplace Link opens in a new window, £50, Fireplace and mantel
Hammerite paint Link opens in a new window, £13.10, Amazon
Valspar Almond Milk in classic Link opens in a new window, £30 for 2.5L, B&Q
Nicole Sage, who runs the Sleek Chic Link opens in a new window blog, transformed her living room when she bought an antique fireplace and wooden mantelpiece off Facebook Marketplace Link opens in a new window for just £50. “To bring it back to life we used hammerite metal paint spray Link opens in a new window and painted the mantel white with paint we already had (it was just natural pine before).” If you want to achieve a similar look, Nicole offered a great tip to make sure you bag a Facebook Marketplace bargain before anyone else. “You can set reminders for specific keywords, so you’ll know as soon as someone has listed, for example, a cast iron fireplace. Fireplaces are quite sought after, but don’t be afraid to haggle down the price!” Nicole then painted the wall around the fireplace with Valspar Almond Milk paint from B&Q Link opens in a new window. “Restoring the aged fireplace back to life has achieved a designer look, but on a serious budget. It’s also what would have previously stood in our Victorian terrace house, so it's brought period authenticity and timelessness back into the living room.”
If you have a bit more spending money, you could go on to add some alcove shelving Link opens in a new window, a storage cabinet, and new new flooring Link opens in a new window like Nicole, who tackled the DIY herself. “We’ve added value by building into the dead space. It’s created additional storage and the open shelving creates instant visual interest.” She finished off the look by adding some new flooring. “Laminate is much more cost effective than engineered wood flooring, but still gives the same aesthetic. The old flooring was a really tired, poorly fitted laminate and the new flooring adds such a warm, modern aesthetic to the living room.”
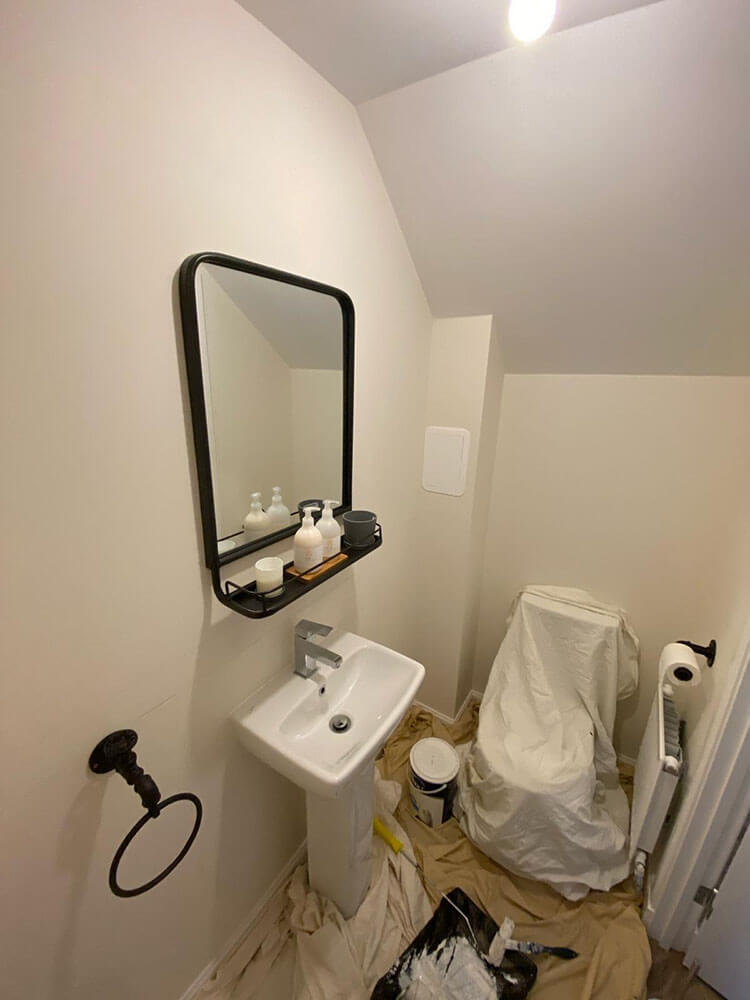
5. Add statement wallpaper and panelling to a small bathroom
Total cost: £99.29
MDF Link opens in a new window sheet 6mm x 2.4 x 1.2m from local hardware store, £25
Black Jack Frenchic Paint Link opens in a new window, £21.95, Frenchic
Rasch safari wallpaper Link opens in a new window, £24.99, World of Wallpaper
No Nails adhesive Link opens in a new window, £4.50, Amazon
Decorators caulk Link opens in a new window, £4.88, Amazon
Wood primer Link opens in a new window, £7, Amazon
Frog tape Link opens in a new window, £5.49, Amazon
Polyfilla Link opens in a new window, £3.49, Amazon
Sandpaper Link opens in a new window, £1.99, Amazon
Upcycler Alex Lawson of Casa Lawson Link opens in a new window used one sheet of MDF from her local hardware store to create this high-end panelling look in her bathroom. “I requested for the sheet to be cut into 10cm strips. I was then able to secure these to the wall using No Nails adhesive.” Alex’s top tip is to have patience and draw out a design on a sheet of paper first. “Work out the measurements and double check them before you begin any cutting. Be careful to always use a spirit level to ensure the design is straight and don't rely on door frames/skirtings as your plumb line as our houses are often a little wonky, especially older ones.” Her other bit of advice was to prime the MDF with a wood primer before painting. This ensures you get as rich a paint colour as possible on your finished look. “This is such a cost-effective way to really elevate the room. My guests have a whole safari experience when they use the WC when visiting.”

Looking to spruce up your home?
Discover a wide world of interest-paying products and watch your home décor fund grow.
Find out more